Overview
The Permissions administration screen let you able to restrict the visibility of some items.
Three tabs in this screen allow to choose the users that are able to display the following items:
- the Request Approvals button appearing on the top of the issue view screen
- the Issue Approval button appearing on the top of the issue view screen
![]() You are able to manage these settings by Projects and to grant privileges to Groups, Project Roles, Reporter and Assignee.
You are able to manage these settings by Projects and to grant privileges to Groups, Project Roles, Reporter and Assignee.
- the Approval drop-down on the Jira navigation bar
If no custom setting is applied on the Request Approvals, the default behavior is the following:
- all users having browsing permission on the issue are able to view the Request Approvals button
- the Request Approvals button appears on the issues found in the source status requiring approvals
If no custom setting is applied on the Issue Approval, the default behavior is the following:
- only System Administrators, project lead, users in the group Jira-administrators and in the project role administrator can view the Issue Approval button
- the Issue Approval button appears on any issue of any project.
If no custom setting is applied on the Approval drop-down, the default behavior is the following:
- any user can view the Approval drop-down on the Jira navigation bar.
The following screenshot shows the Request Approvals and the Issue Approval buttons on the issue.

The following screenshot shows the Approval drop-down on the Jira navigation bar.

Manage restrictions on the capability to notify an Approval Request via email
Navigate the Approval Request tab on the Permission Administration screen in order to enable the Request Approvals button on the issues belonging to the selected projects exclusively.
The available options include:
- All, that allows to enable the Request Approvals button on all projects (Default)
- Only Selected Projects, that allows to enable the Request Approvals button on the selected projects exclusively.
Do not select any project to avoid displaying the button on any project.
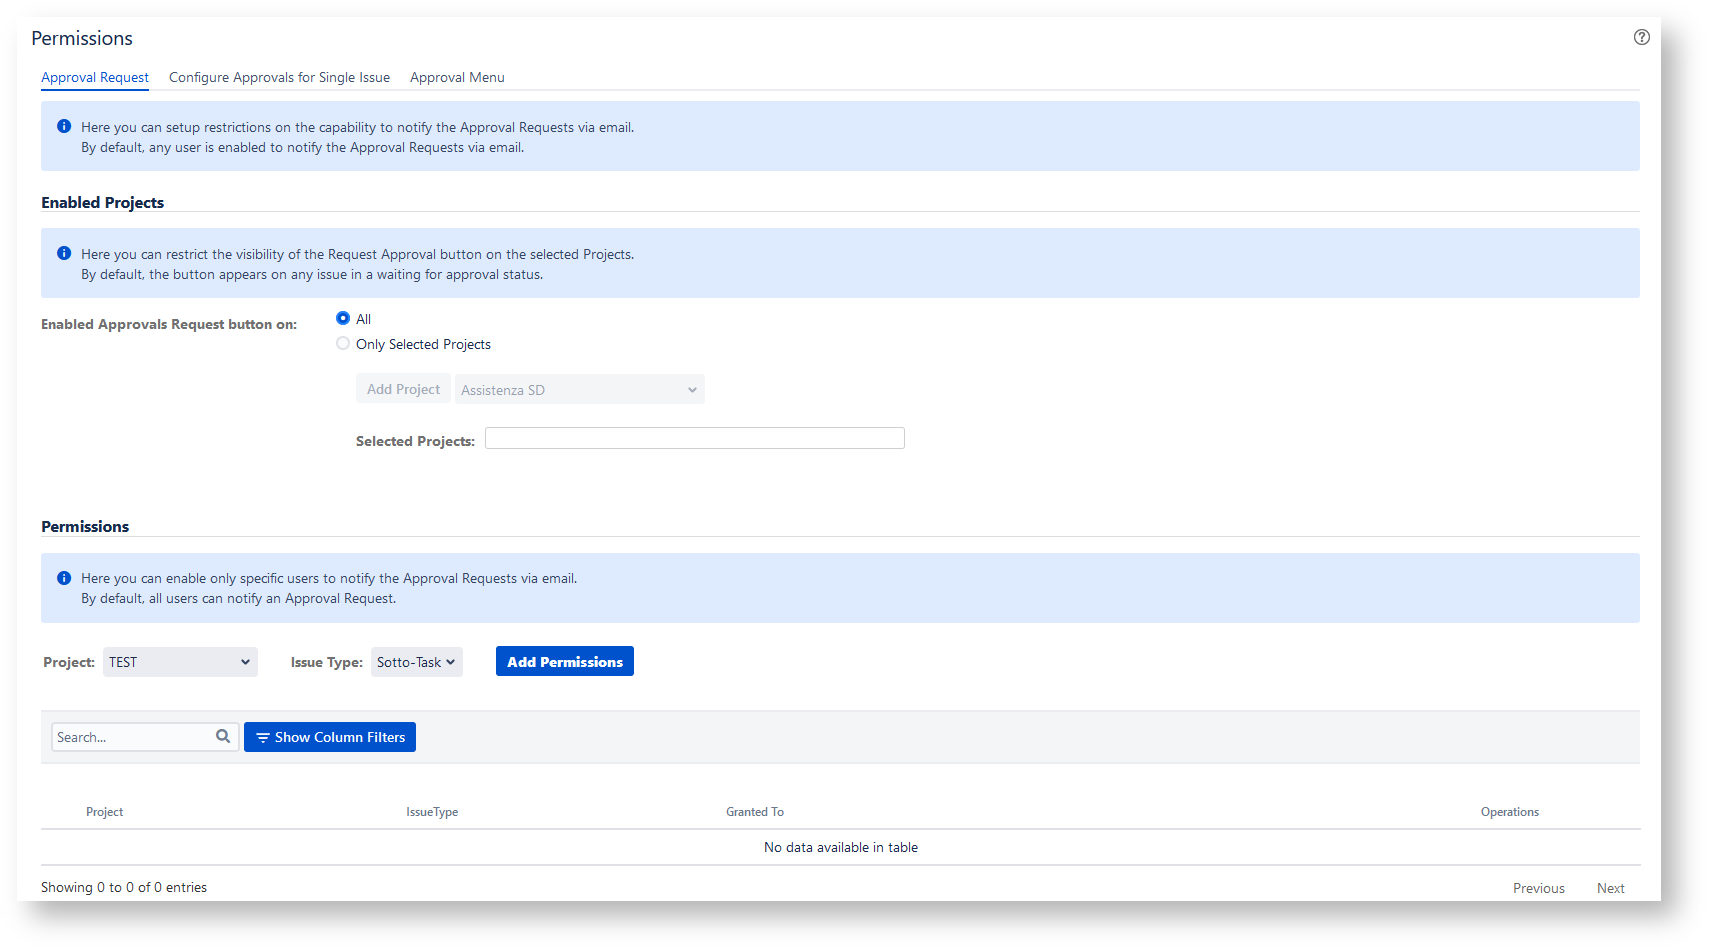
The Project select list will include all projects enabled to display the Request Approvals button.

Select a Project and an Issue Type and click Add Permissions to enable only selected Users, Groups, Project Rules, Report, Assignee and Project lead to display the Request Approvals button.

Manage restrictions on the capability to setup Approvals for a single issue
Navigate the Configure Approvals for single issue tab on the Permission Administration screen in order to enable the Issue Approval button on the issues belonging to the selected projects exclusively.
The available options include:
- All, that allows to enable the Issue Approval button on all projects (Default)
- Only Selected Projects, that allows to enable the Issue Approval button on the selected projects exclusively.
Do not select any project to avoid displaying the button on any project.
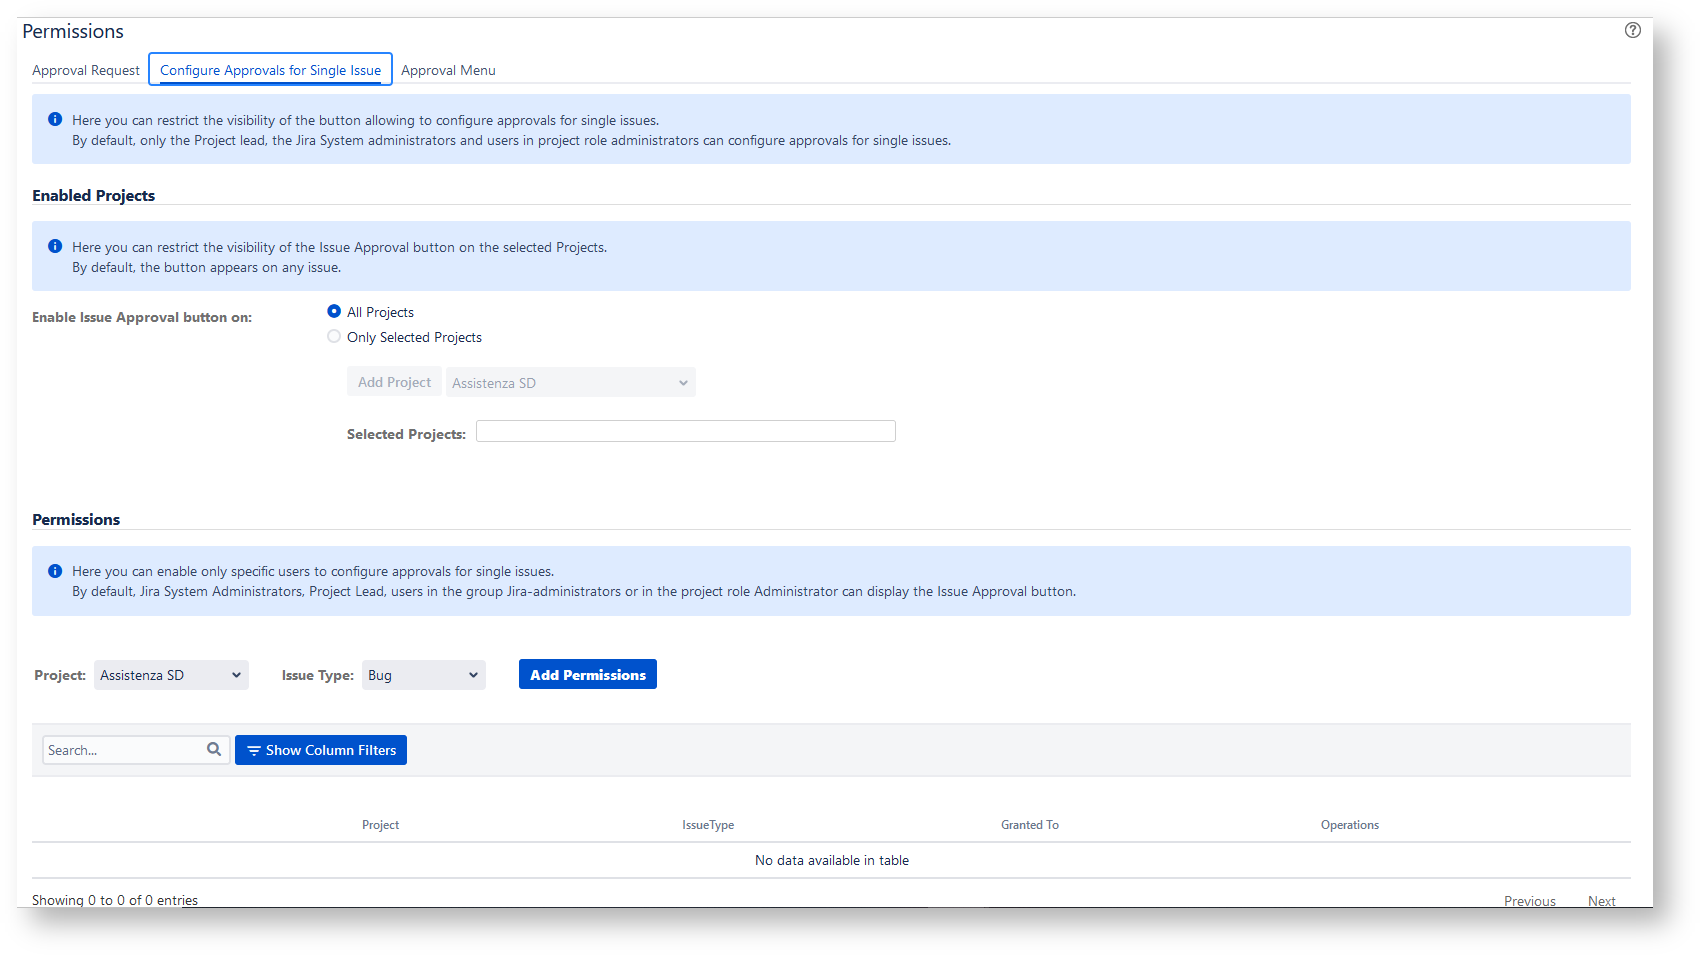
The Project select list will include all projects enabled to display the Idssue Approval button.

Select a Project and an Issue Type and click Add Permissions to enable only selected Users, Groups, Project Rules, Report, Assignee and Project lead to display the Issue Approval button.

Manage restrictions on the capability to view the Approval drop-down on the Jira navigation bar
Navigate the Approval Menu tab on the Permission Administration screen in order to enable only selected Users and Groups to view the Approval drop-down on the Jira navigation bar.
Choose Custom Settings in order to enable only the selected Users and Groups to display the Approval drop-down on the Jira navigation bar.
