Navigate to the Add-Ons Panel within your Jira installation in order to access the Herzum Approval Administration Screens.
Jira ADMINISTRATION → Add-Ons → HERZUM APPROVAL
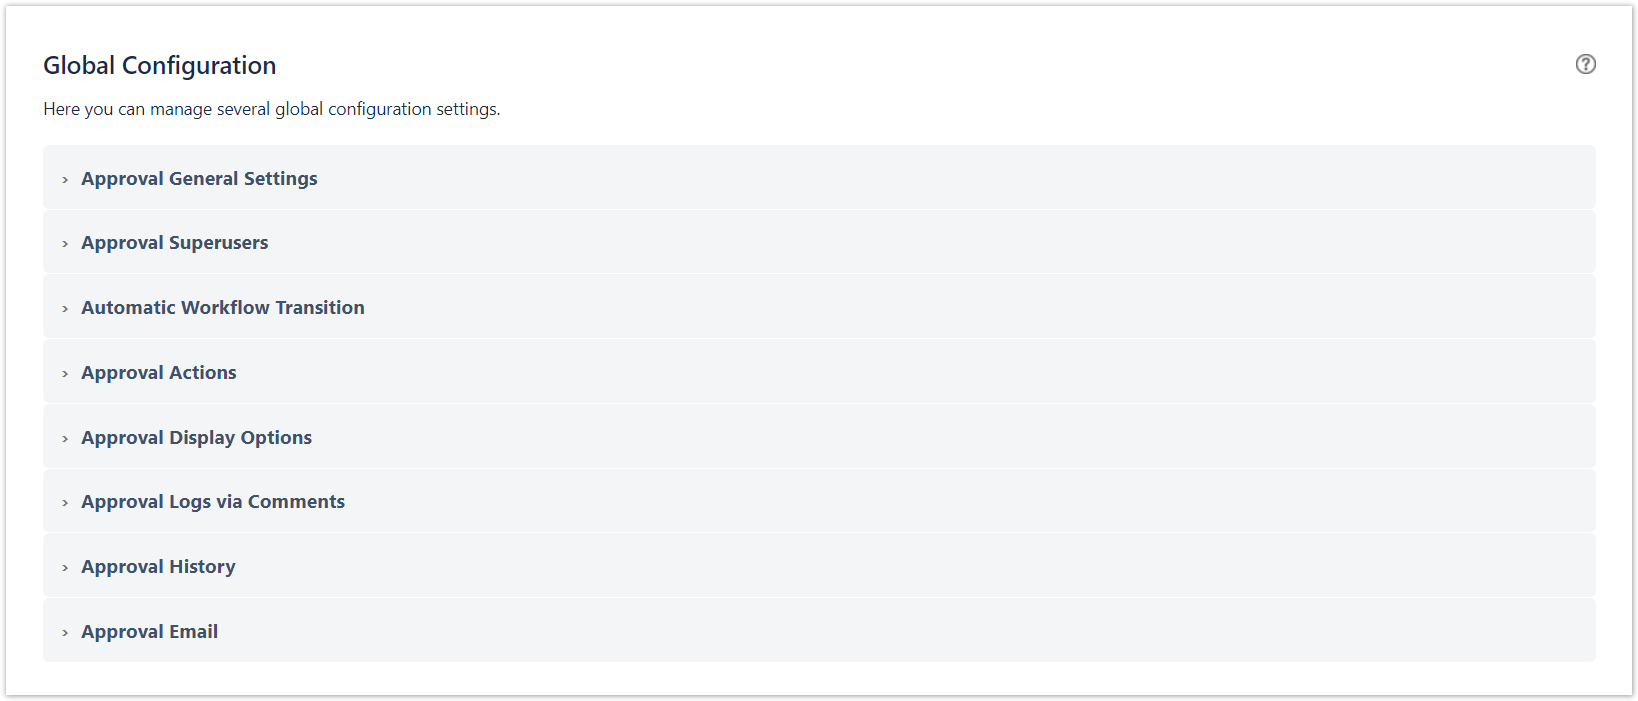
The Global Configuration screen allows you to manage the following setting:
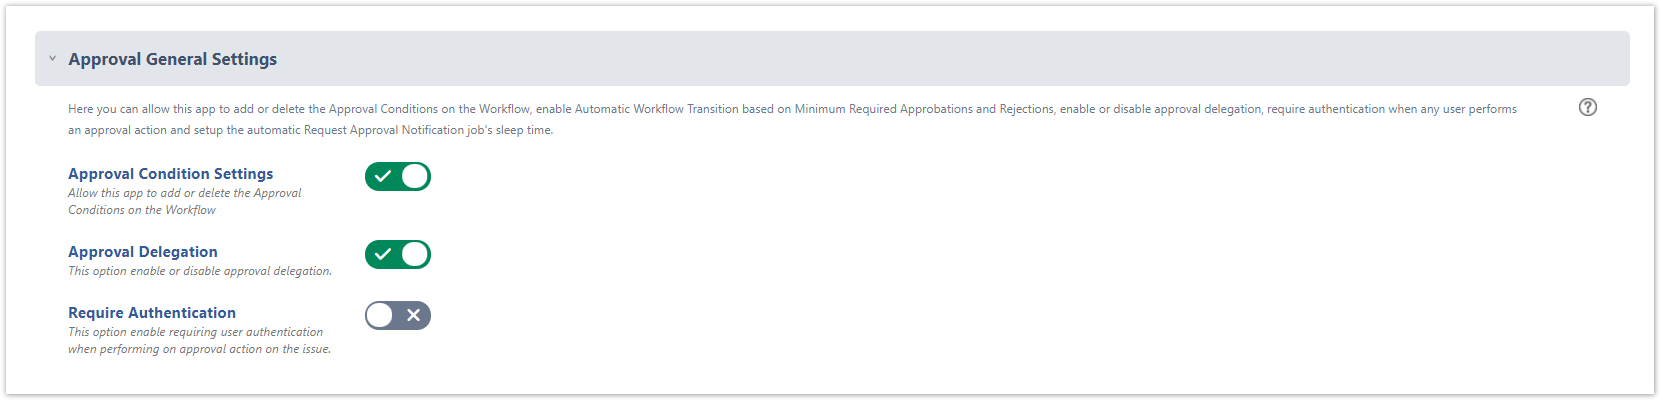
- Approval General Settings
- Approval Condition Settings → enable/disable the automatic the automatic addition and deletion of the Approval Conditions on the workflows (Enabled by default).
 Enabled
 - Approval Delegation → enable/disable the Approval delegation functionalities (Disabled by default).
 Enabled
 - Require Authentication → enable/disable the request for authentication when the approver submit the approval decision (Disabled by default).
- Approval Condition Settings → enable/disable the automatic the automatic addition and deletion of the Approval Conditions on the workflows (Enabled by default).
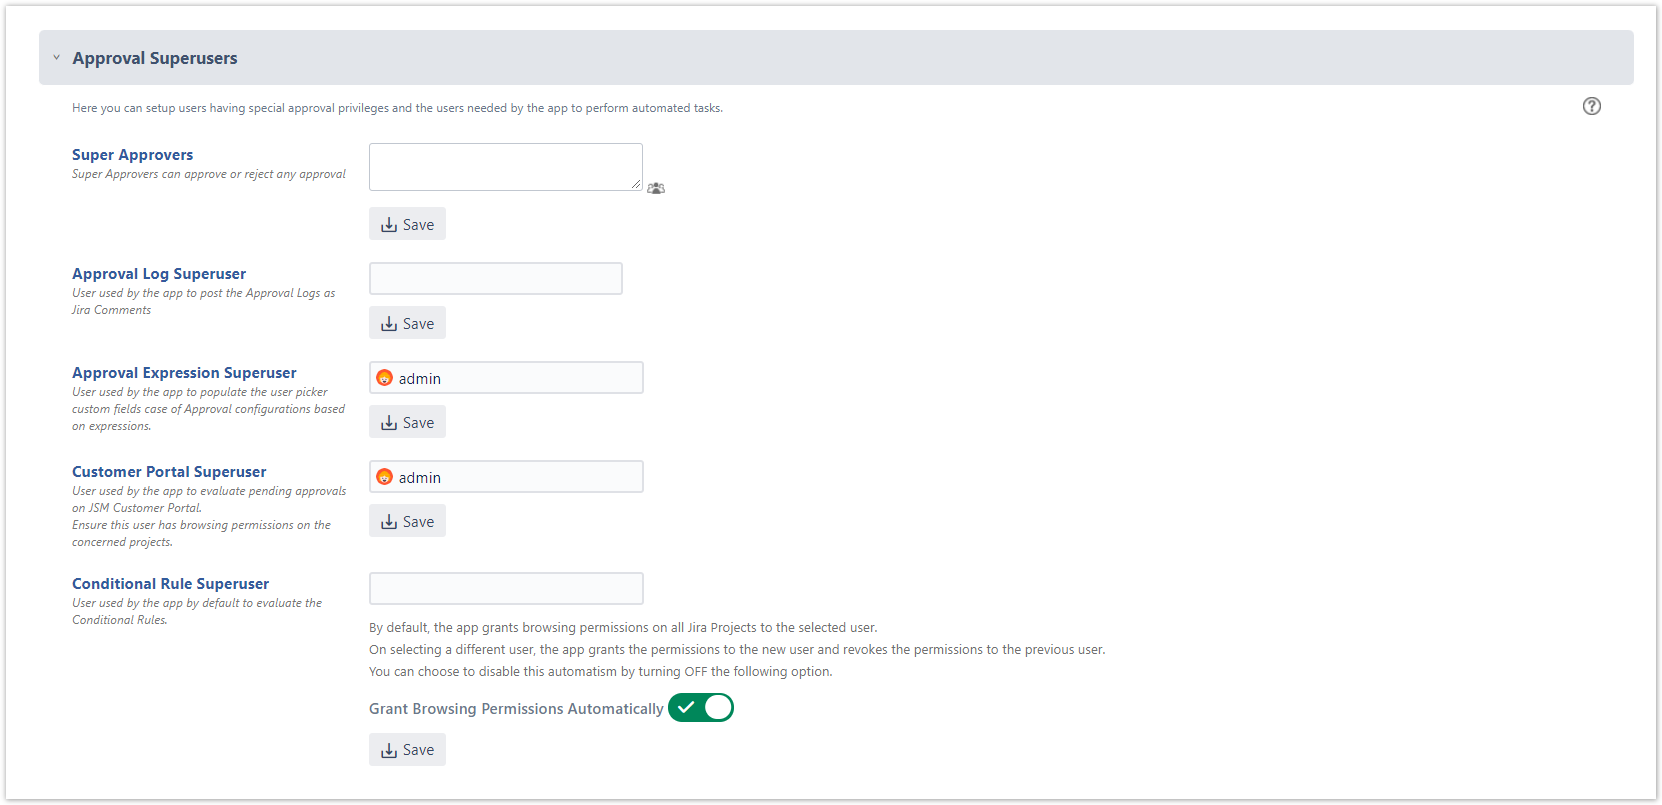
- Approval Superusers
- Super Approvers → provides selected users with special privileges to approve or reject any approval (Not set by default).
- Approval Log Superuser → User used by the app to post the Approval Logs as Jira Comments (Not set by default. When it's not set, the app uses the user that take the approval decision).
- Approval Expression Superuser → User used by the app to populate the user picker custom fields case of Approval configurations based on expressions (Not set by default). It's mandatory to select an user in order to create Approval configurations based on expressions. Select Superuser
- Customer Portal Superuser → User used by the app to evaluate pending approvals on JSM Customer Portal (Not set by default). It's mandatory to select an user in order to display pending approvals on JSM Customer Portal.
- Select Superuser
- Conditional Rule Superuser → User used by the app by default to evaluate the Conditional Rules (Not set by default). It's mandatory to select an user in order to create Conditional Rules. Select Superuser
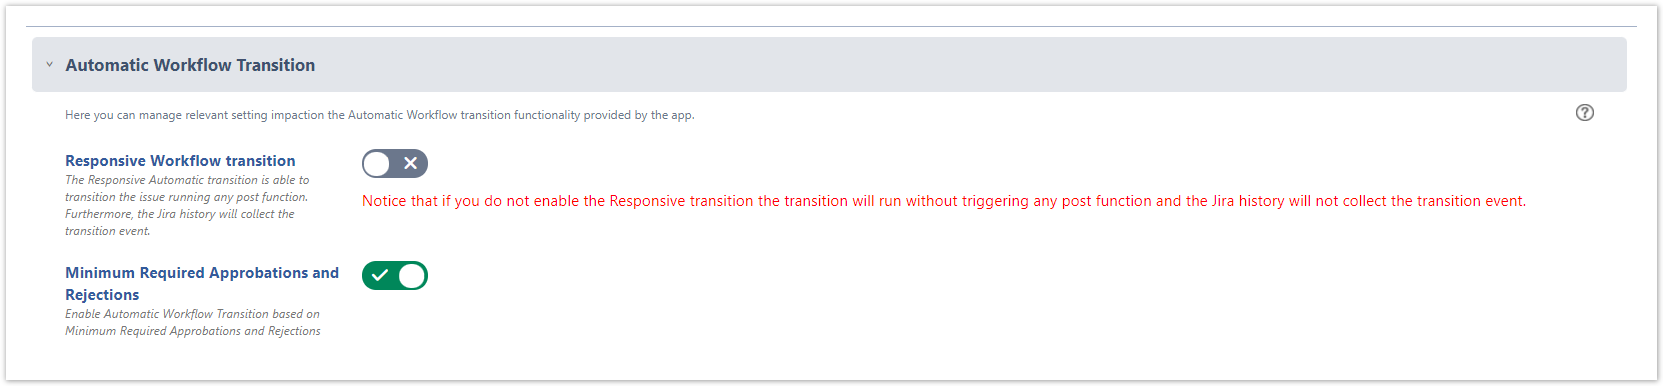
- Automatic Workflow transition
Responsive Workflow transition → Enable the Responsive Automatic transition in order to allow the app to transition the issue by running post functions and make the Jira history. consistent with the transition event (Disabled by default). It's recommended to enable it and select the Automatic Workflow Transition Superuser that will be used by the app to run the automatic workflow transition.
 Select Superuser
- Minimum Required Approbations and Rejections → Enable Automatic Workflow Transition based on Minimum Required Approbations and Rejections (Disabled by default). Enabled
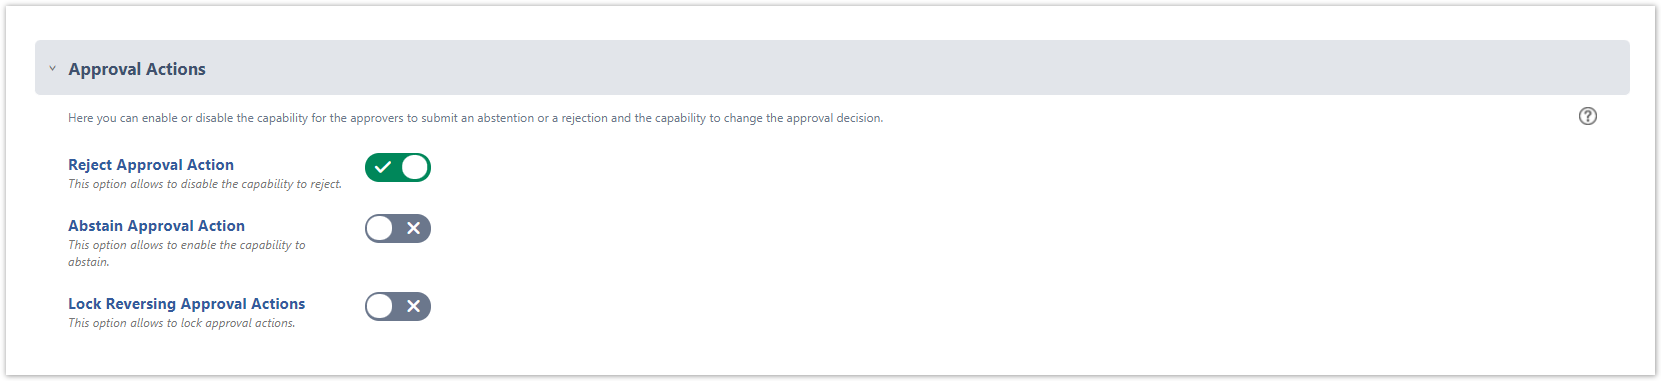
- Approval Actions
Reject Approval Action → This option allows to disable the capability to reject (Enabled by default)
Abstain Approval Action → This option allows to enable the capability to abstain (Disabled by default).
Lock Reversing Approval Actions → This option allows to lock approval actions (Disabled by default).
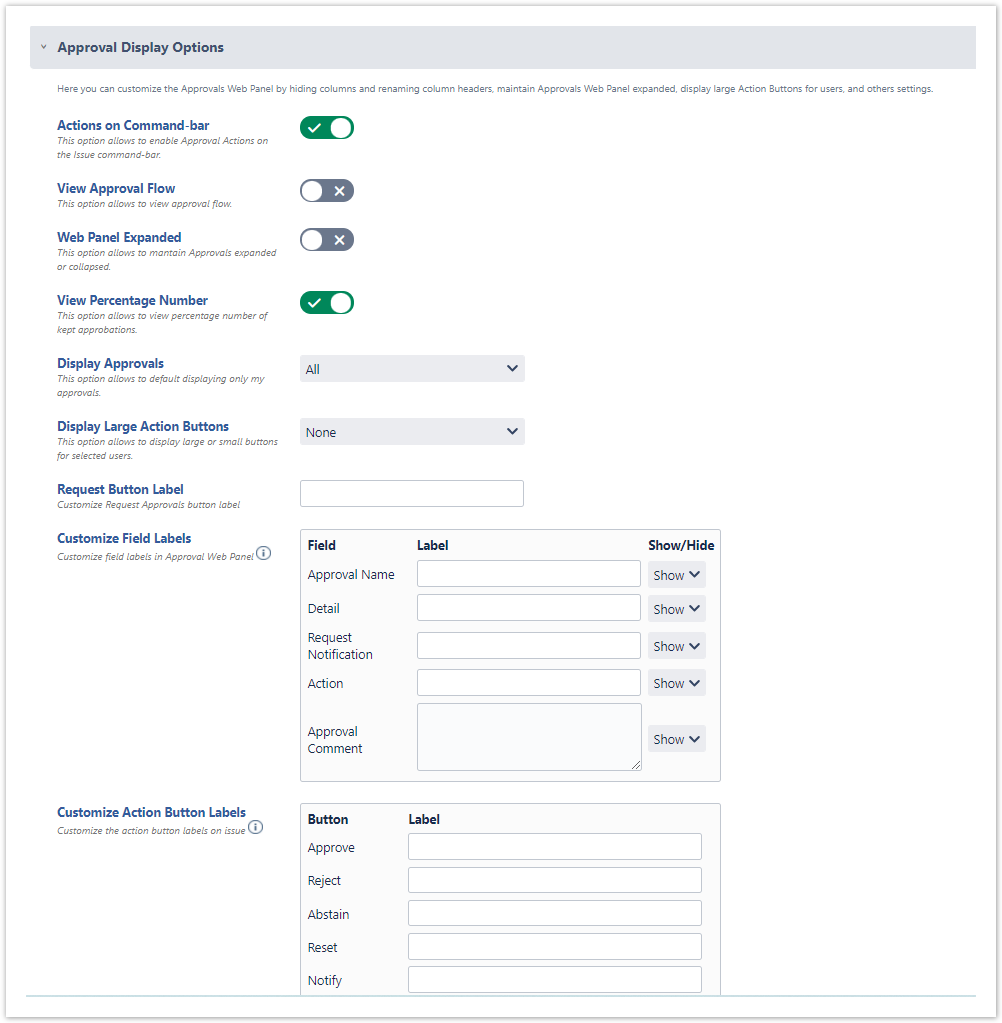
- Approval Display Options
Actions on Command-bar → This option allows to enable Approval Actions on the Issue command-bar (Disabled by default).
View Approval Flow → This option allows to view approval flow (Disabled by default).
EnabledWeb Panel Expanded → This option allows to maintain Approvals expanded or collapsed (Disabled by default).
EnabledView Percentage Number → This option allows to view percentage number of kept approbations (Enabled by default).
Display Approvals → This option allows to default displaying only own approvals for logged user (The logged user displays all approvals by default).
Only My ApprovalsDisplay Large Action Buttons → This option allows to display large or small buttons for selected users (No user displays large buttons by default).
EnabledRequest Button Label → Customize Request Approvals button label (No label by default). If no custom label is inserted, the button default label 'Request Approvals' displays.
Customize Field Labels → Customize field labels in Approval Web Panel help (No label by default). If no custom label is inserted, the default field labels display.
Customize Action Button Labels → Customize the action button labels on issue (No label by default). If no custom label is inserted, the default button labels display.
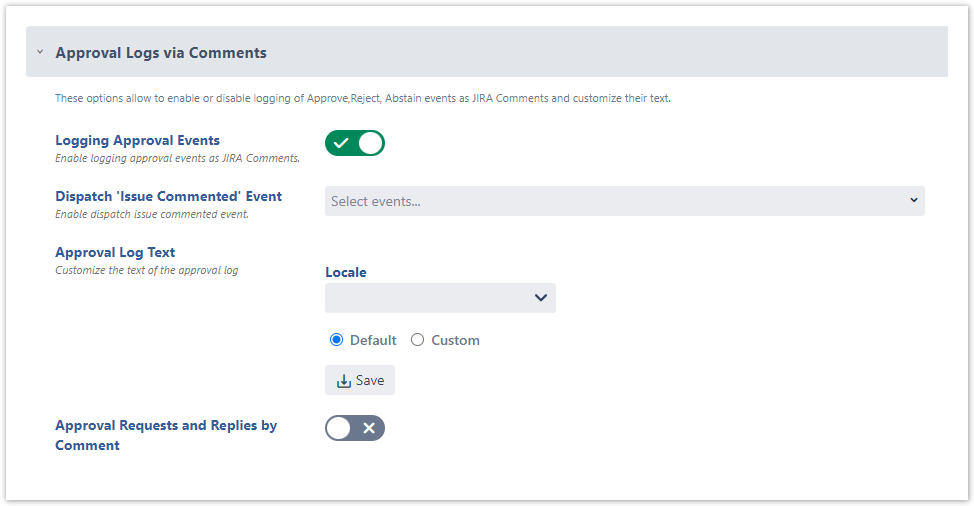
- Approval Logs via Comments
Logging Approval Events → Enable logging approval events as JIRA Comments (Enabled by default).
Dispatch 'Issue Commented' Event → Enable dispatching issue commented event (No event is enabled by default).
Approval Log Text → Customize the text of the approval log (No Locale and No Custom Log Text by default). If no Locale and no Custom Log Text is set, the default log text is added to Jira comments.
- Approval Requests and Replies by Comment → Enable notifying the approval request via a Jira comment and processing the approver response from a Jira comment (Disabled by default).
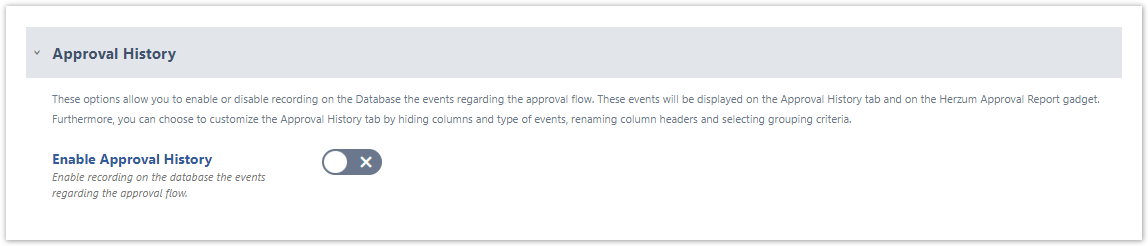
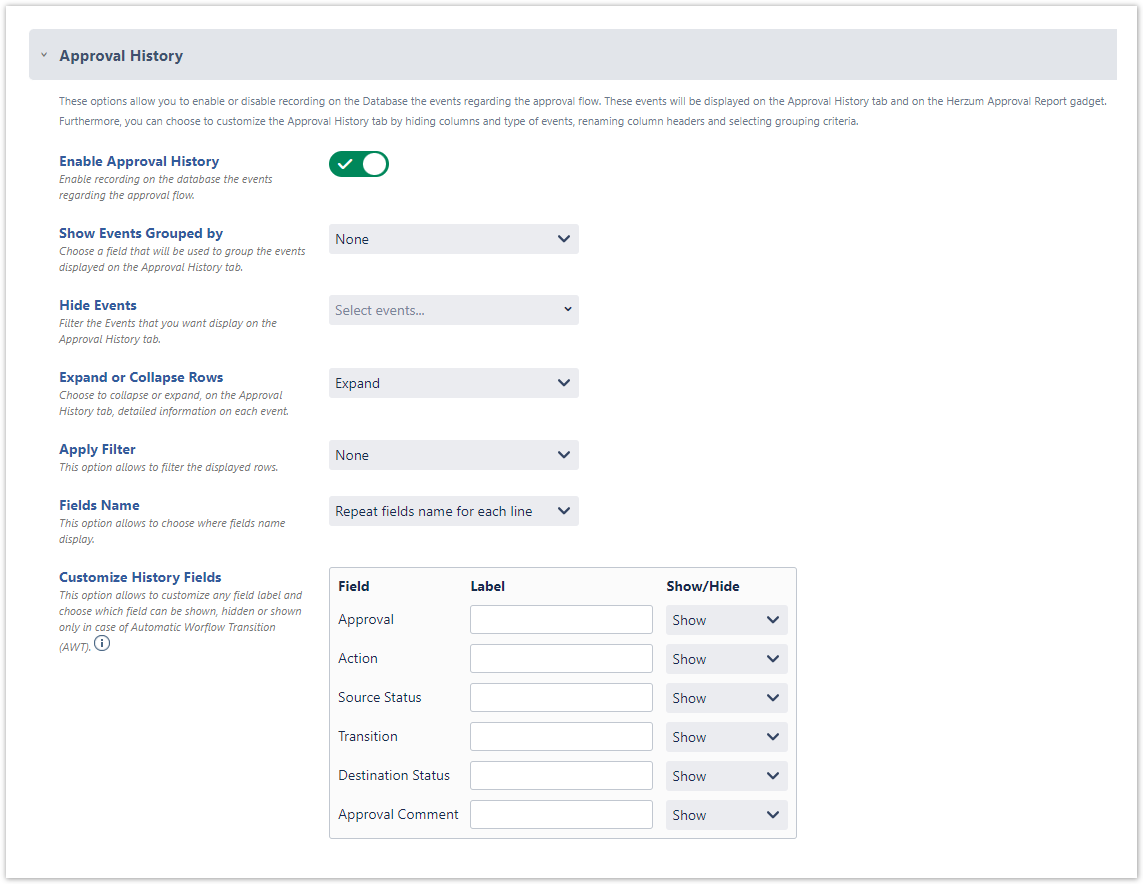
- Approval History
- Enable Approval History → Enable recording on the database the events regarding the approval flow (Disabled by default). It's recommended to enable Approval History. It allows to display approval events on the Approval History tab on the issue and on the Herzum Approval Gadget that can be displayed on Jira Dashboards. Enable
Show Events Grouped by → Choose a field that will be used to group the events displayed on the Approval History tab (None by default).
Hide Events → Filter the Events that you want display on the Approval History tab (None by default).
Expand or Collapse Rows → Choose to collapse or expand, on the Approval History tab, detailed information on each event (Expanded by default).
Apply Filter → This option allows to filter the displayed rows (None by default).
Fields Name → This option allows to choose where fields name display (Repeat fields name for each line by default).
Customize History Fields → This option allows to customize any field label and choose to show or hide them (No custom label by default and each field show).
- Enable Approval History → Enable recording on the database the events regarding the approval flow (Disabled by default). It's recommended to enable Approval History. It allows to display approval events on the Approval History tab on the issue and on the Herzum Approval Gadget that can be displayed on Jira Dashboards.
- Approval Email
From Email Address → Email address used to notify the Approvals Request emails (No custom From Email Address by default). If it is not set, the Project email address (when configured), or the Outgoing email address is used.
Email Approval Delimiter → Customize the the delimiter of the approval reply @ ('@' by default).
Warning message Authentication → Warning message appearing on emails notifying that the Authentication is required (No custom Warning message text by default). If it is not set, the default Warning message text is used.
Warning message Approval comment → Warning message appearing on emails notifying that the Approval Comment is mandatory and it is missing (No custom Warning message text for missing Approval comment by default). If it is not set, the default Warning message text is used.
Customize E-mail buttons → You can customize the label displayed on each button of the Approval Request Email (No custom label by default). If a label is not set, the default label is used.
- Email Icons → You can upload images to chose when customizing an email template.

Legend: Highlights on administering configurations
![]() mandatory setting
mandatory setting
![]() best practice
best practice
![]() suggested settings that can improve your users experience.
suggested settings that can improve your users experience.

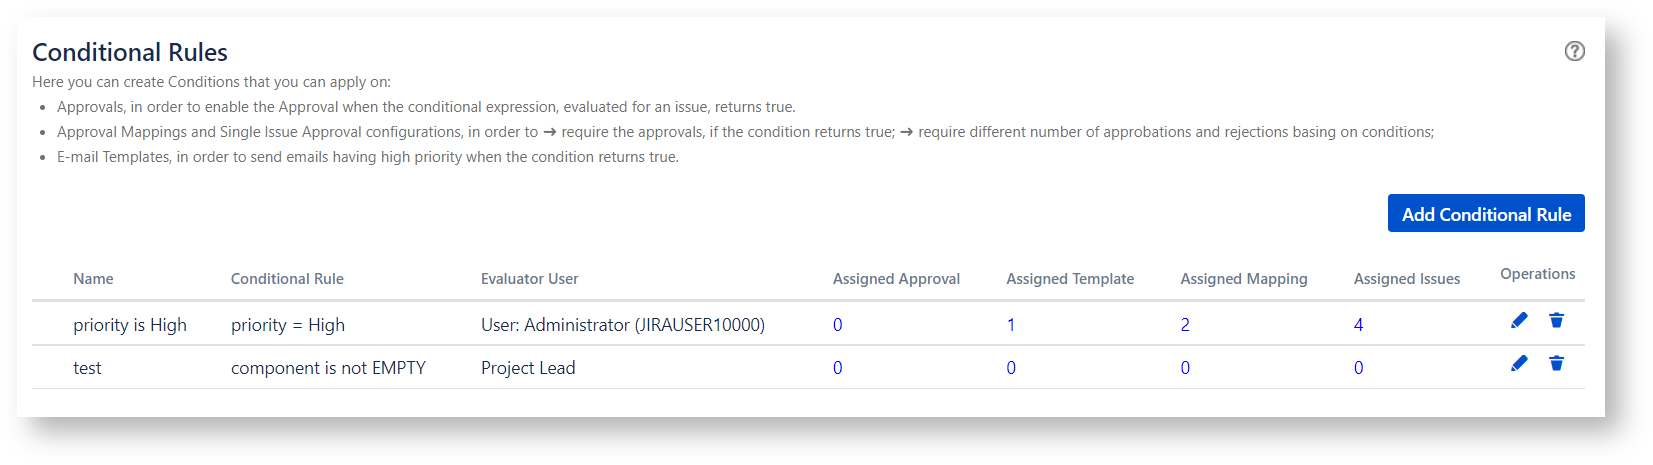
The Global Configuration screen allows you to manage Conditional Rules.
The Conditional rules are Jql expressions that can be used to to meet complex requirements (e.g eable/disable Approvals, Minimum Required Rejections, etc).
In addition, the conditional Rules can be used to enable/disable an Email template or to prioritize the emails.
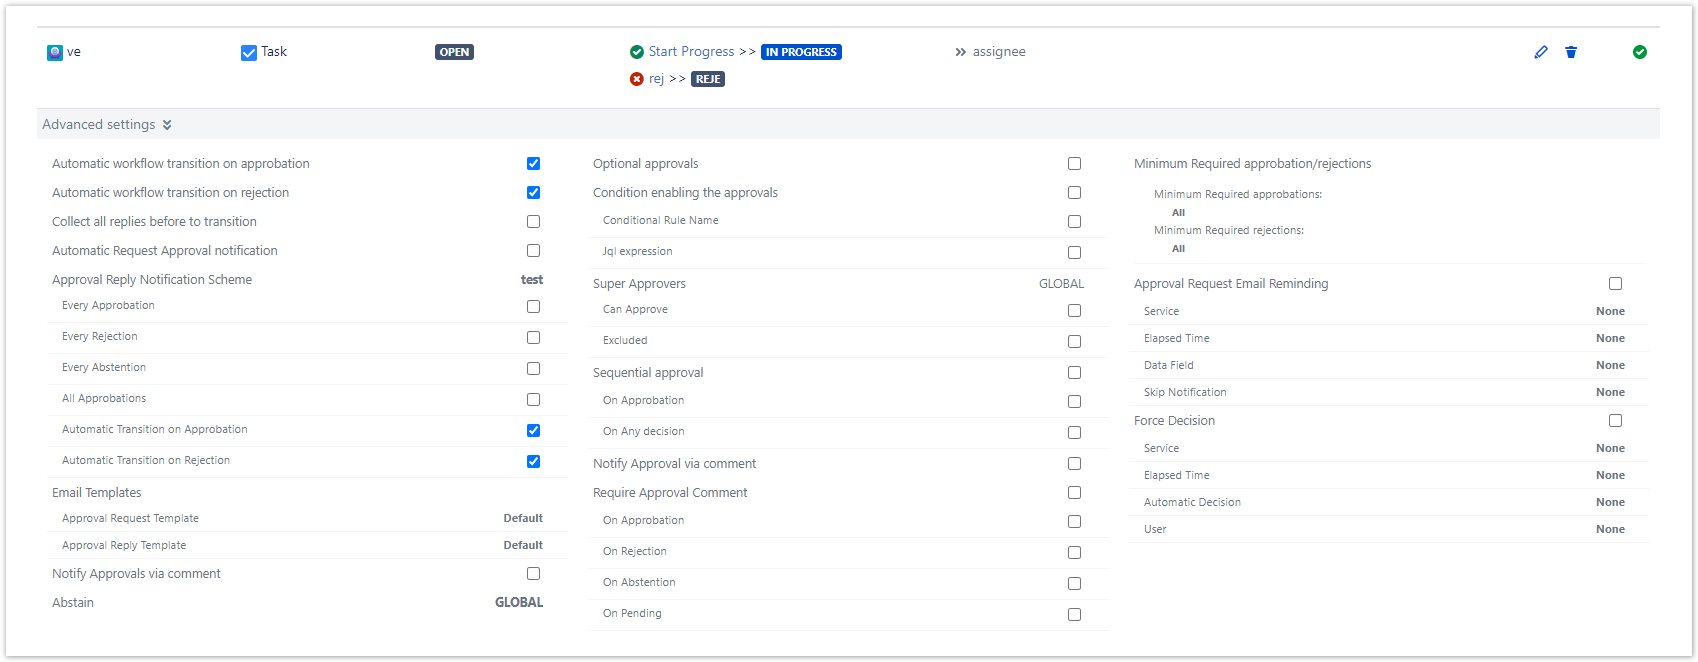
The Approval Mapping screen allows you to setup your Approval Flows by Project and Issue Type..
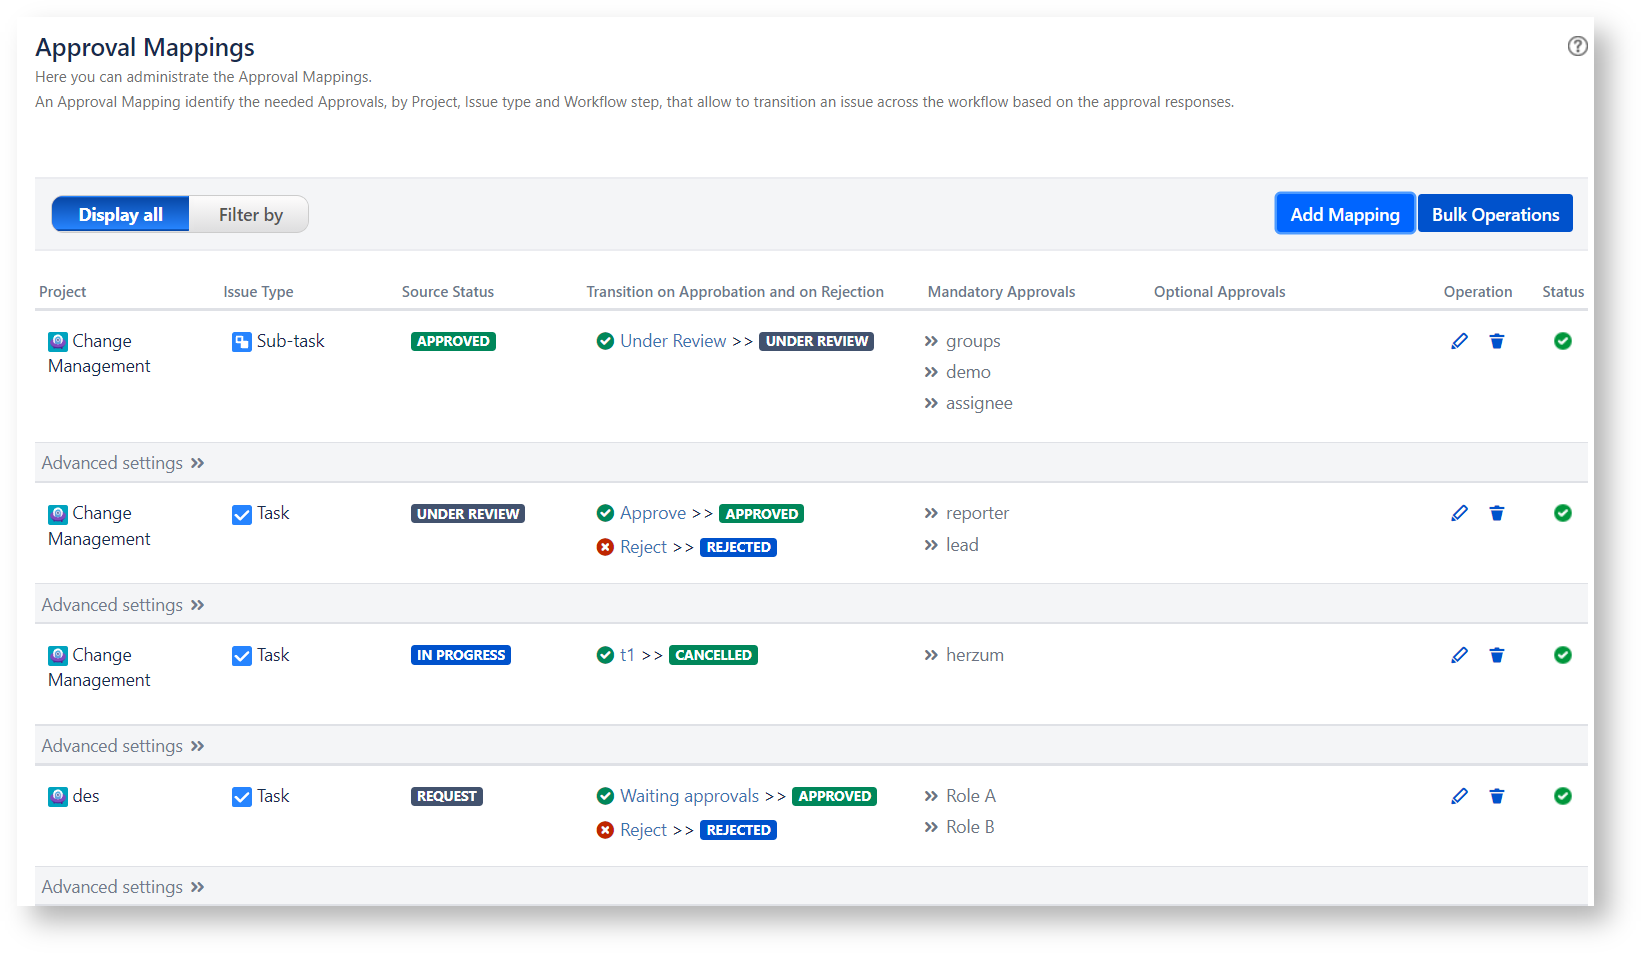
Notice that Project leads, Jira System administrators and users in project role Administrators can setup a specific approval workflow for a single issue by default.
They can manage this setting by navigating an issue and clicking the Issue Approval button.
Review a detailed documentation of this topic at Get Started as an Approval Flow on Single Issue Administrator.
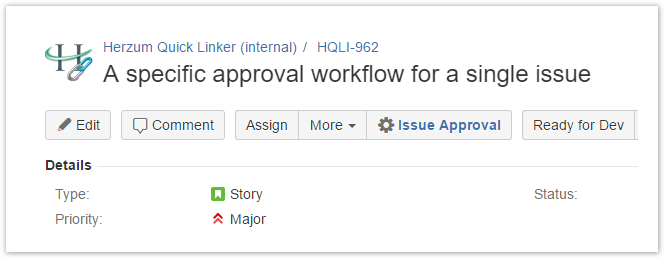
![]() The Approval workflow for a single issue overwrites the Approval Mappings per Project and Issue type.
The Approval workflow for a single issue overwrites the Approval Mappings per Project and Issue type.
You are able to disable this functionality on the Permissions administration screen.
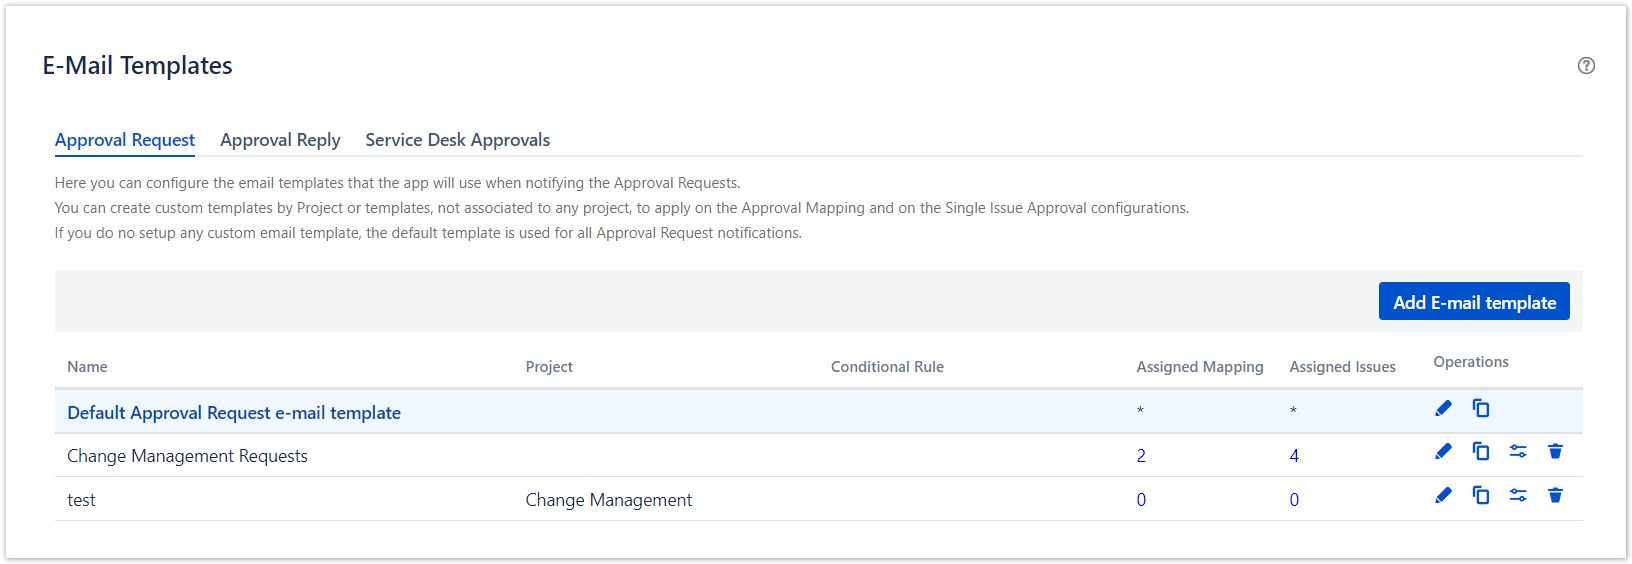
The E-Mail Templates screen allows you to create custom email templates for Approval Request and Approval Reply emails
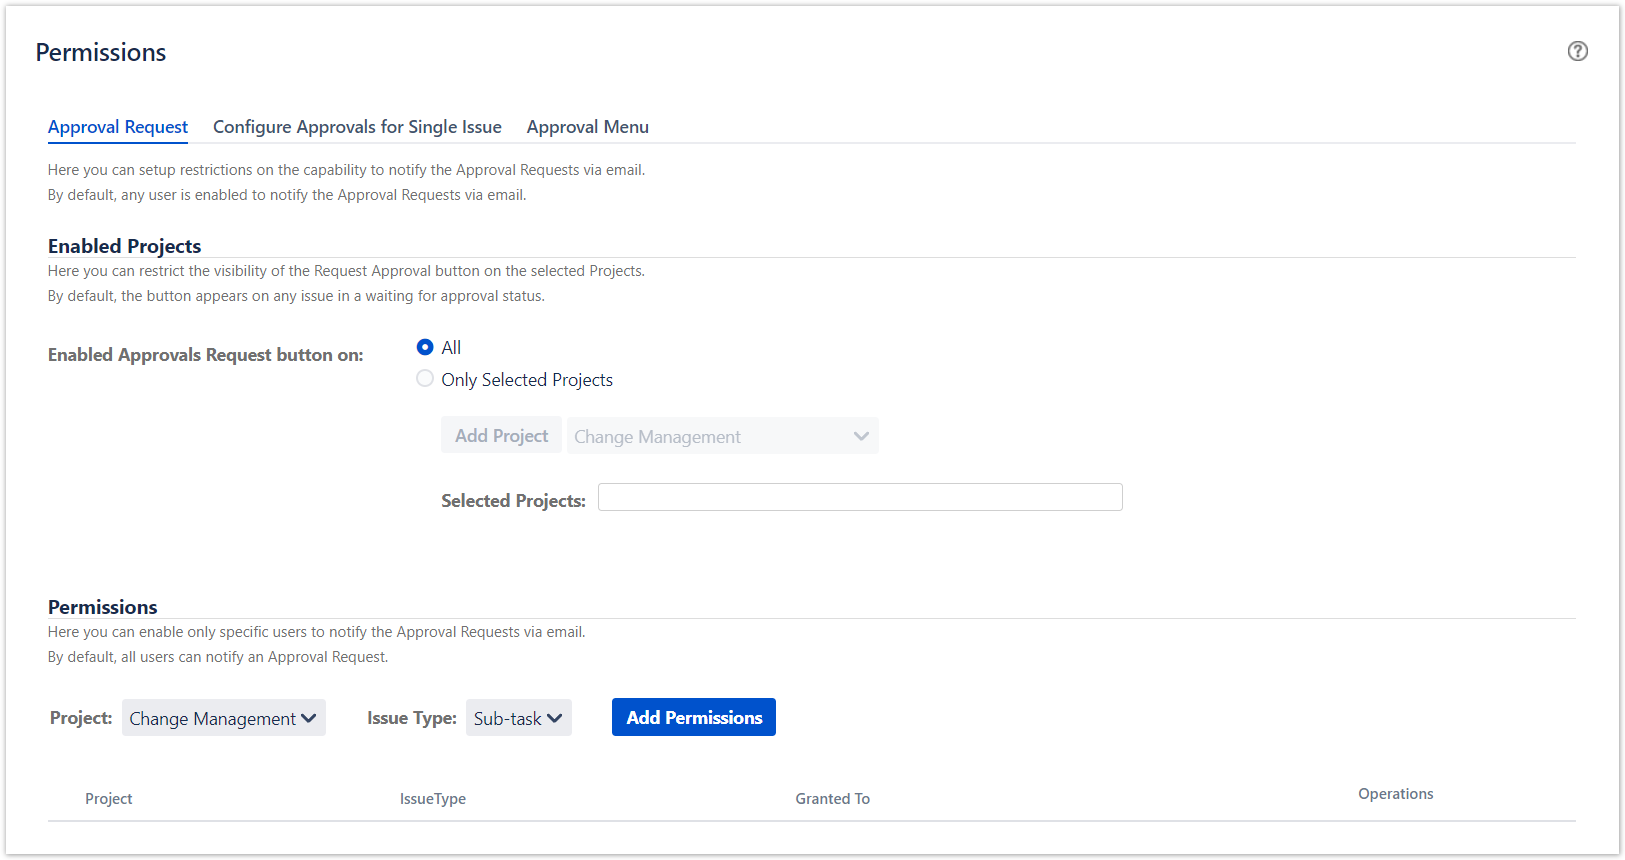
The Permissions screen allows you to grant o deny the permissions to Notify the Approval Requests, Configure Approval Flow for single issues, Dispaly the Approval Menu.
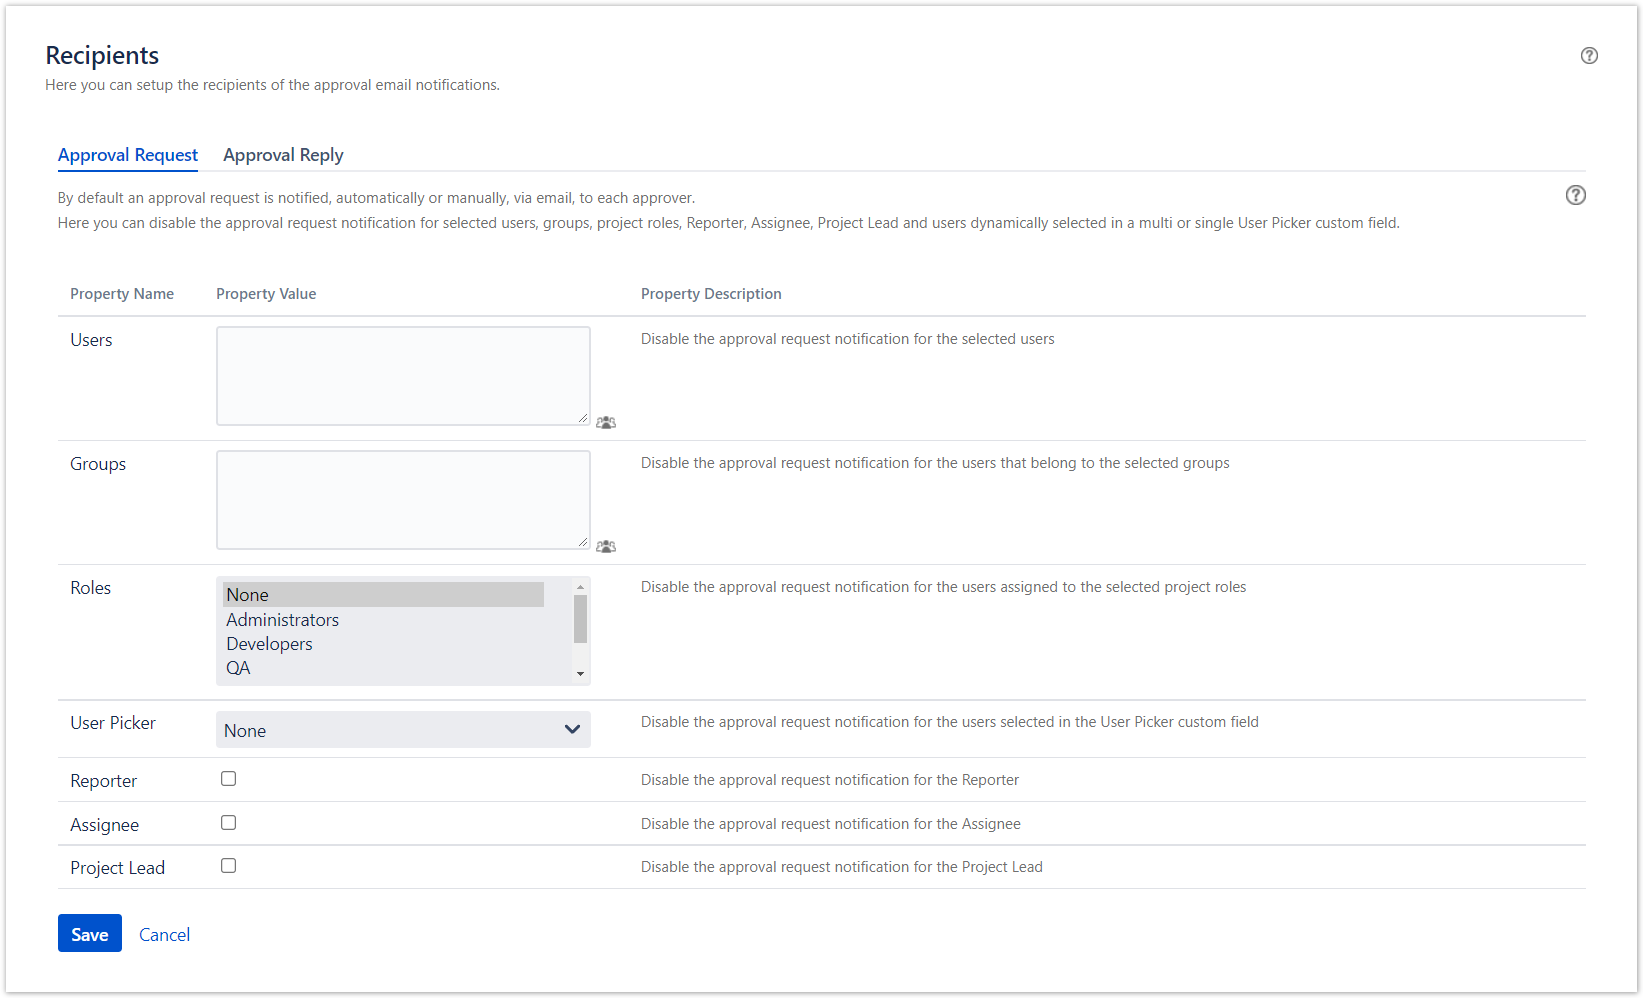
The Recipient screen allows you to customize the recipients of the emails notifying an approval Request and Approval Responses.
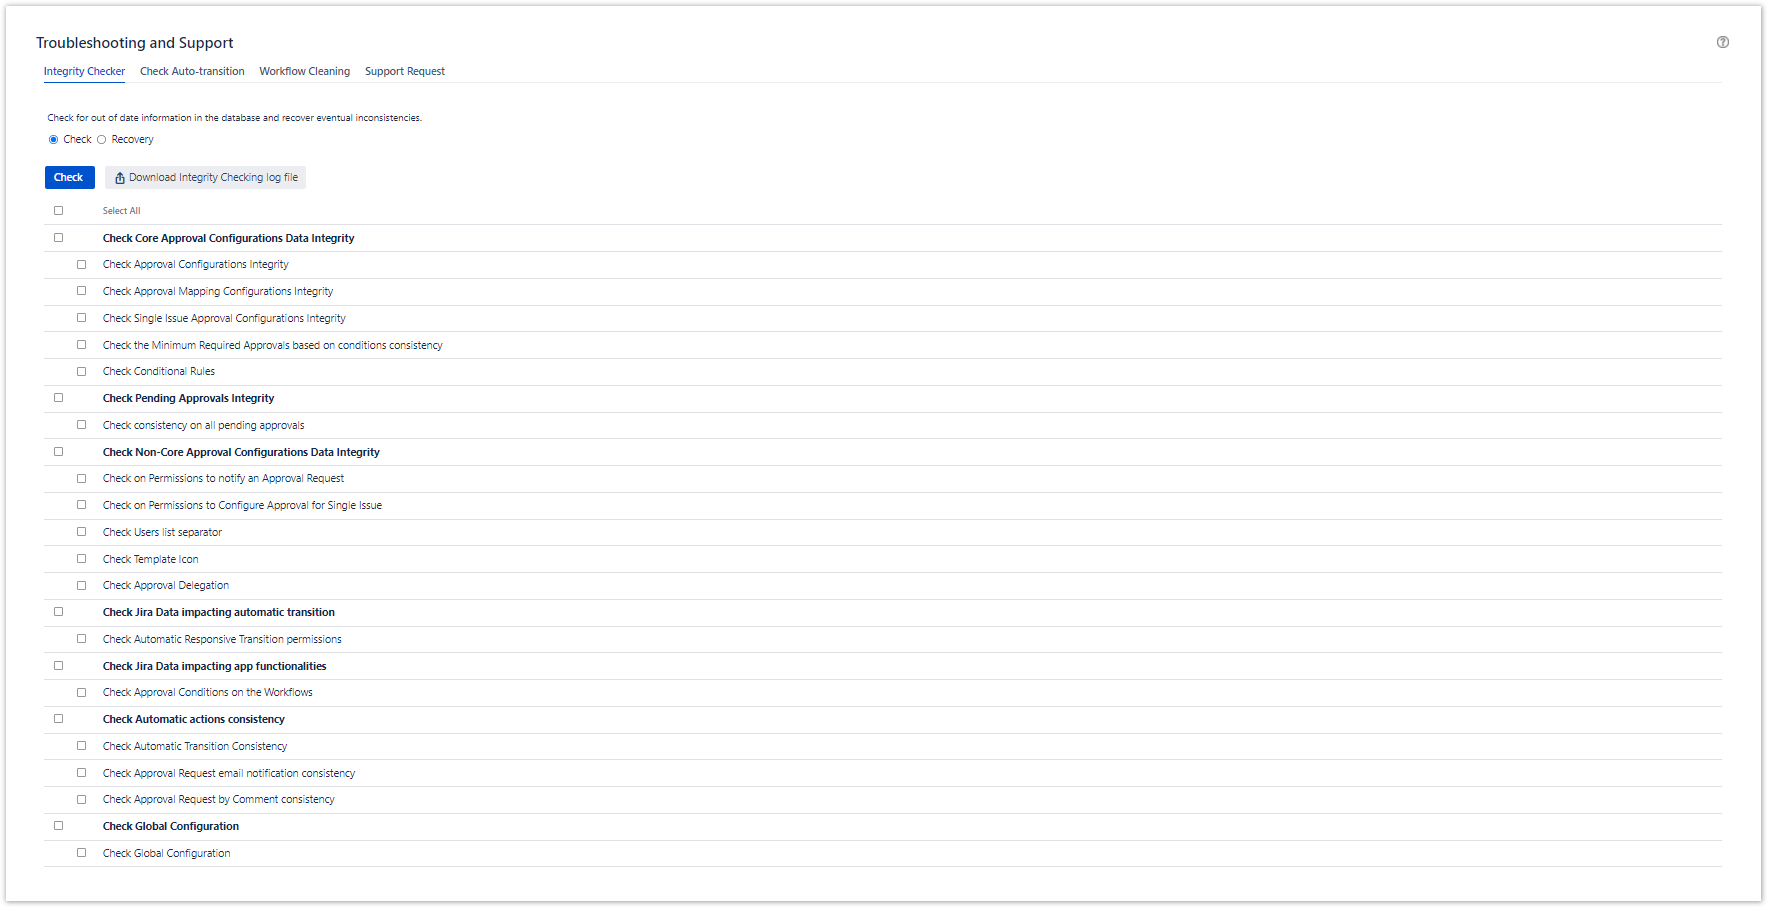
The Troubleshooting and Support screen allows you to perform
- the Check for inconsistencies of Approval Data with respect the Jira referenced data (e.g Project, Issue Type, Users) when the Jira data changes cannot be handled by capturing a Jira event
- the Recovery of inconsistencies relating missing referenced data in Jira and in case of some unexpected errors (e.g. missing automatic notification)
- other administrative Utilities
As a Jira administrator, you are able to export and import Approval configurations from a Jira instance to another instance on-premises.

As a Jira administrator, you are able to delegate the approval authority of any user to another one.

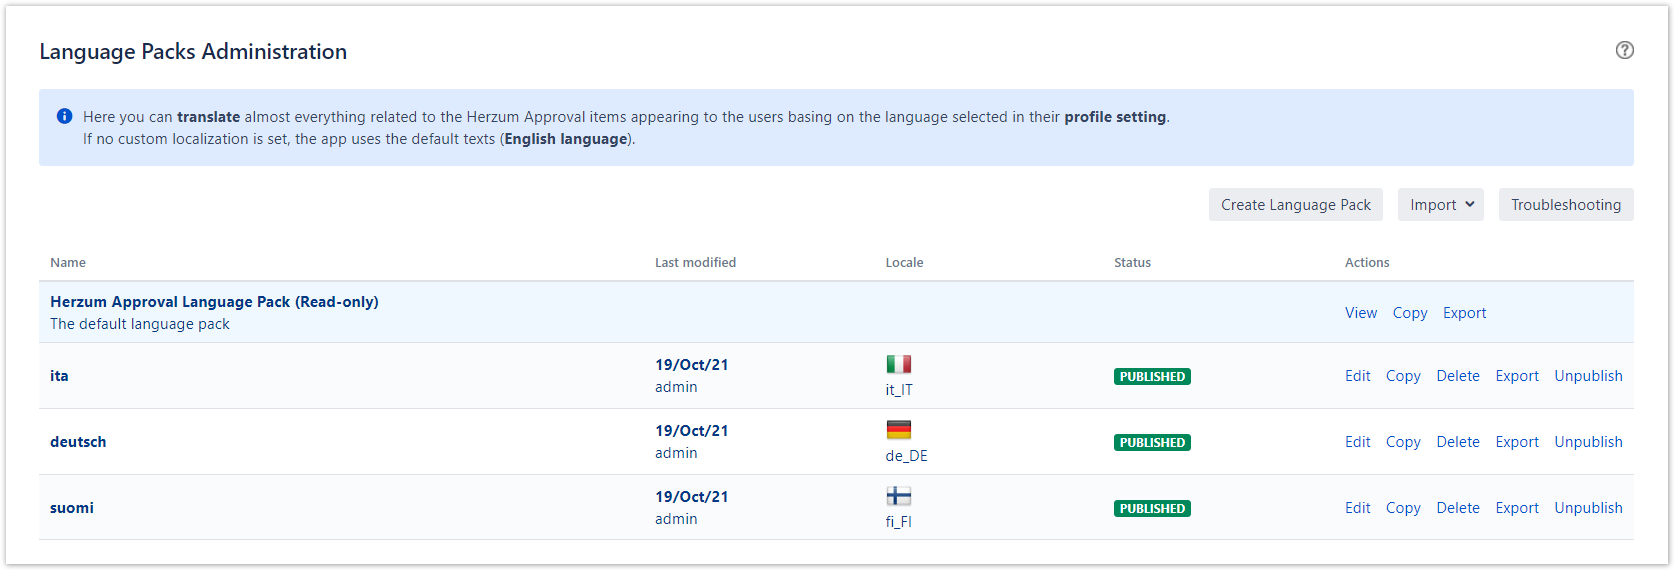
As a Jira administrator, you can manage Language packs in order to translate almost everything related to the Herzum Approval items appearing to the users basing on the language selected in their profile setting.
As a Jira administrator, you can anonymize users to hide or delete any data that can identify them as a real person.

The Advanced screen allows you to manage Herzum Approval Mail handler, Services, Validators and Post Functions.

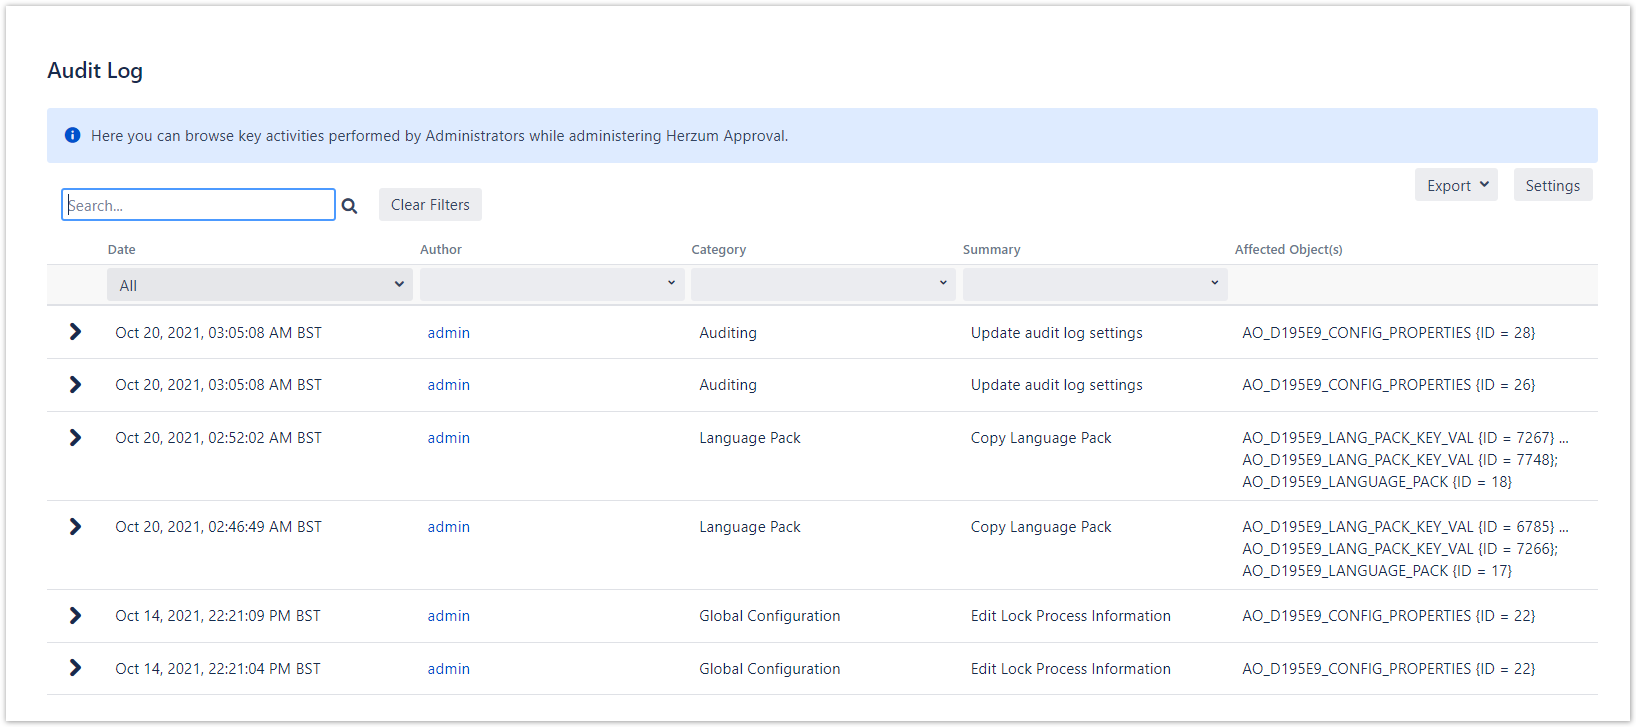
The Audit Log administration screen allows you to monitor the administrative activities performed by any Jira Administrator on the Herzum Approval administration screens.
Any question or suggestion?
We would love to hear from you.
We will go into more detail in the following pages.