This page contains all information necessary to install and configure Herzum Approval add-on.
Add-on compatibility
Herzum Approval Plugin has the following compatibility
| Plugin Version | 4.3 | 4.4 | 5.0 | 5.1 | 6.0 | 6.1 |
|---|---|---|---|---|---|---|
| 1.0.0-GA-6.0-6.1 |  | |
Installation
Installation Steps:
- Go to "Administration" → "Add-ons"
- Select "Find new add-ons" and search "Approval Plugin"
- Select "Approval Plugin" and click "Buy Now" Button
Configuration
Configure Approvals
Go to "Administration" → "Add-ons" → "Approval Administration"
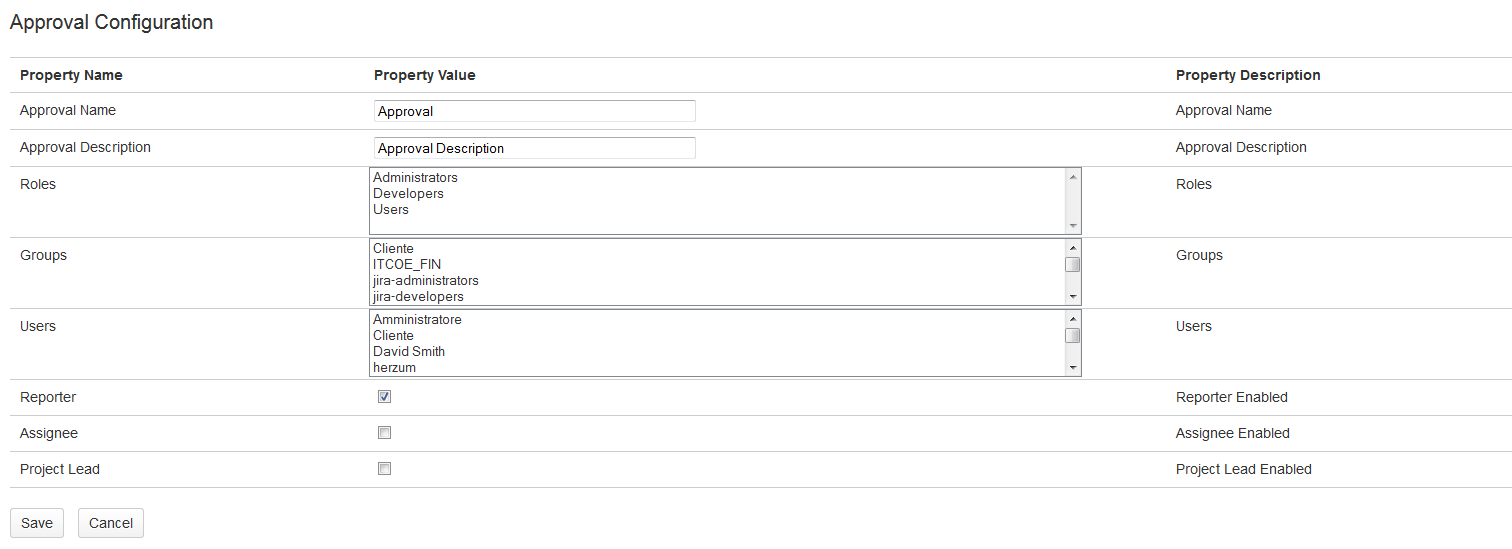
- Click on "Add New Approval" button
- Enter "Approval Name" and "Approval Description", then select or check one of following field:
- "Roles", one or more;
- "Groups", one or more;
- "Users", one or more;
- "Reporter";
- "Assignee";
- "Project Lead".
- Enter "Approval Name" and "Approval Description", then select or check one of following field:
- Click "Save" button
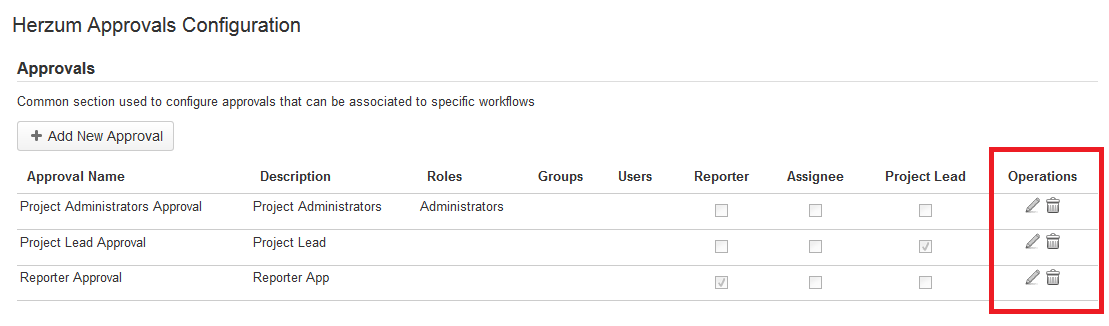
- It is possible to edit/delete an existing approval clicking the related buttons
Configure Approval Mapping
User can create an Approval Mapping: he can add one or more approval/s to a single issue type of a project for a specific transition.
- Go to "Administration" → "Add-ons" → "Approval Mapping Administration";
- Select a project and an issue type. Linked workflow will be shown to right;
- Select a transition;
- Drag an Approval from "Available Approvals" to "Requested Approvals";
- For remove an Approval drag it from "Requestes Approvals" to "Available Approvals".
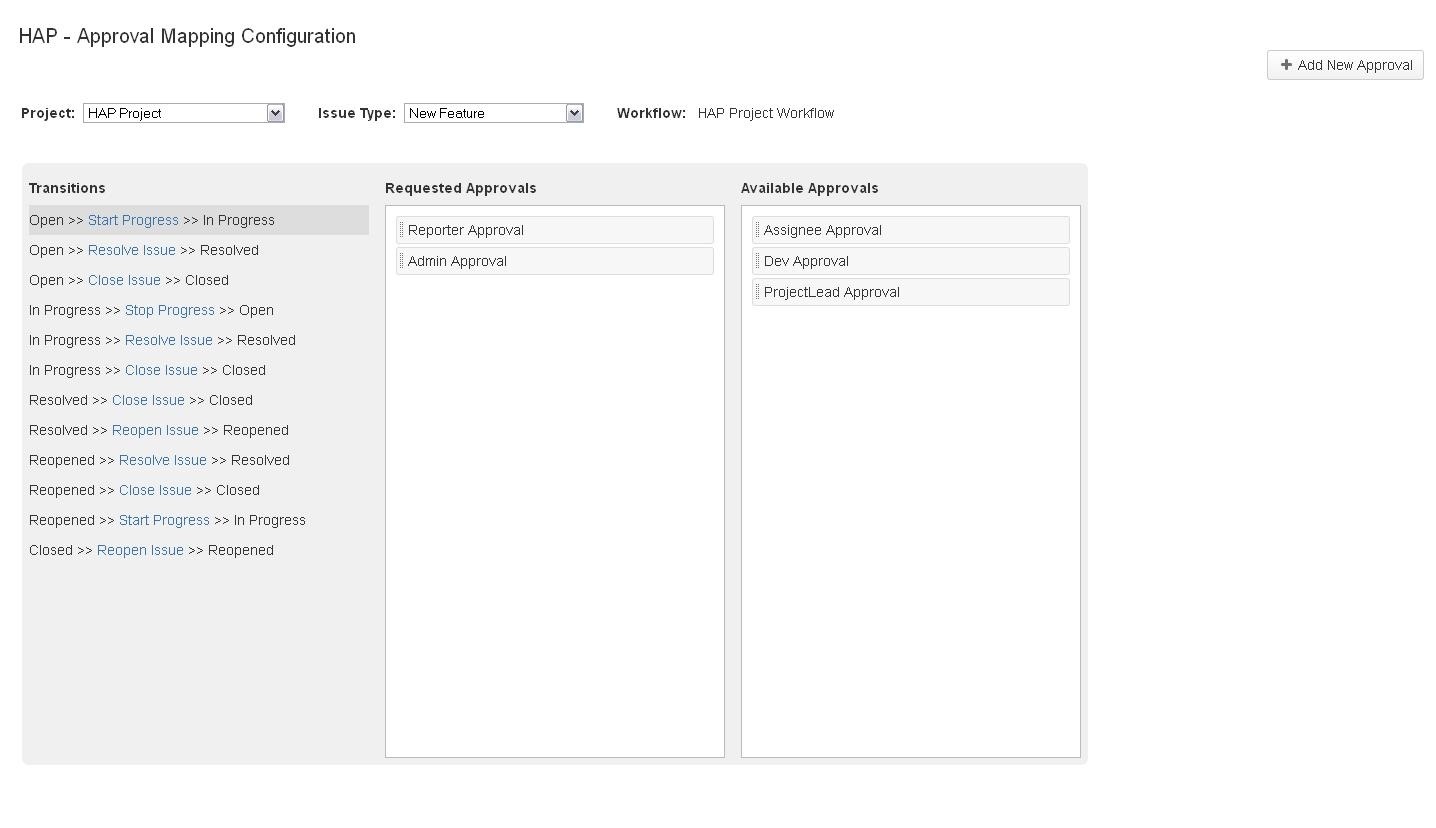
Note: For add a new Approval click on "Add New Approval" button.
If the workflow for project/issue type is the default JIRA workflow isn't possible create an approval mapping (drag&drop is disabled). Should be created a copy or another workflow.
A message is displayed.

Configure Approvals by Email
- Go to "JIRA Administration" -> "System" -> "Mail" -> Incoming Mail
- Setup the "POP/IMAP Mail Servers" that has to manage incoming mail queue
- Add a new Mail Handler

- Add a mail handler name, the related server and choose "Approval Mail Handler" as Handler Type
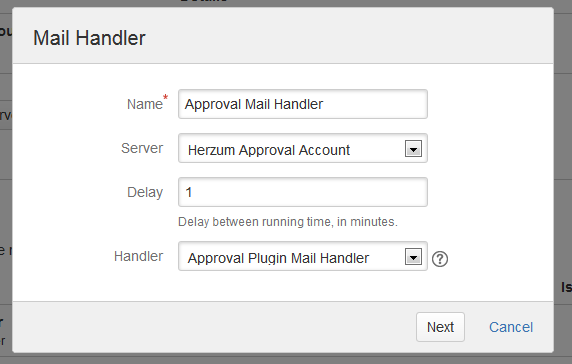
- Click Next and Save
- Approvals by emails have been activated